Building your first shed is one of the most satisfying DIY projects you can undertake. It teaches you every fundamental construction skill, foundation work, framing, roofing, and weatherproofing, while producing something genuinely useful that adds real value to your property. This guide walks you through every stage, from choosing the right site to hanging the final door.
Reader Note: This article contains affiliate links. If you choose to purchase through one, we may earn a small commission at no extra cost to you. We only recommend products we genuinely stand behind. Full disclosure here.
Before You Start: Planning and Permissions
The most common first shed mistake is starting construction without checking local building regulations. Many jurisdictions allow sheds under a certain size, typically 10×12 feet or smaller, without a permit, while larger structures require planning permission and may have setback requirements from property lines. Check with your local council or municipality before breaking ground. This 30 minute research step can save months of complications later.
Also consider your site carefully. A level, well drained location with good access is ideal. Avoid low spots where water pools after rain, moisture is the primary enemy of any timber structure. South or east facing positions get good light while avoiding the harshest afternoon sun in summer.
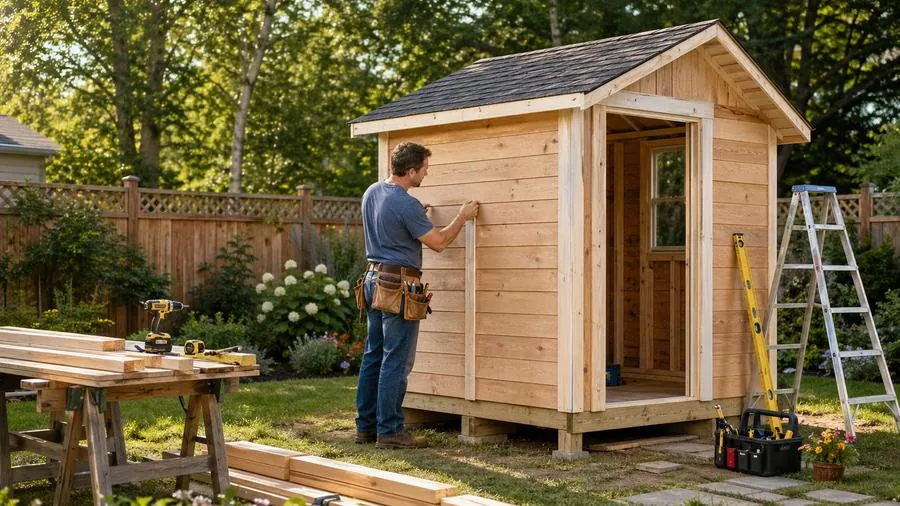
📐 Get Complete Shed Plans with Permits Help Included
Our recommended shed plan library includes over 12,000 shed and outdoor structure designs, from simple 6×6 tool stores to complex multi room garden buildings. Each plan includes material lists, cut sheets, and guidance on permit compliant sizing.
Browse Complete Shed Plans →Step 1: Choose Your Foundation Type
The foundation is the most critical decision in shed construction. Three options suit most DIY builders: concrete slab (most permanent, most work), pressure treated timber skids (easiest, slightly movable), and concrete deck blocks (excellent middle ground, fast to install, adjustable, no frost heaving).
For a first shed, concrete deck blocks are the recommended choice. Set 8,12 blocks at regular intervals on a 4 inch layer of compacted gravel. The gravel promotes drainage and prevents frost uplift. Level each block carefully, a level foundation is the single most important factor in a straight, square shed. Spend extra time here; a slightly off level foundation causes cascading problems through every subsequent stage.
Step 2: Build the Floor Frame
The floor frame consists of rim joists (the outer rectangle) and interior floor joists spanning between them. For most sheds, 2×6 lumber on 16 inch centres provides a strong, bounce free floor. Use pressure treated lumber for all floor framing that contacts or comes near the foundation, regular timber used here will rot within a few seasons.
Square the floor frame using the 3 4 5 method: measure 3 feet along one side, 4 feet along the adjacent side, the diagonal between those two points should measure exactly 5 feet if the corner is perfectly square. Check all four corners before nailing your floor sheathing. A square floor frame makes every subsequent step dramatically easier.
Cover the frame with 3/4 inch exterior grade plywood for the floor sheathing. Stagger the joints between sheets, and ensure the edges of every sheet fall on a joist for proper support. Nail every 6 inches around the perimeter and every 12 inches along interior joists.
Step 3: Frame the Walls
Standard shed wall framing uses 2×4 studs on 16 inch centres. Build each wall flat on the floor, then raise and attach it. This approach is far easier than framing walls in position, you work at ground level, the frame stays square, and raising is a two person, five minute job per wall.
Each wall consists of a bottom plate, top plate, and studs in between. Door openings require a header (doubled 2×4 or 2×6 depending on span) supported by cripple studs and jack studs. Window openings follow the same principle. Mark your stud layout precisely, inconsistent spacing causes problems when attaching sheathing and interior cladding later.
💡 Framing Tip: After raising each wall, brace it temporarily with a diagonal 2×4 before moving to the next wall. Unbraced walls can rack and fall in any wind, and a racked wall frame is extremely difficult to square after the fact. Brace everything before releasing your hands from it.
Step 4: Frame the Roof
The simplest first shed roof is a gable roof with a moderate pitch (4:12 is ideal, steep enough to shed water, shallow enough for easy rafter cutting). Each rafter requires three cuts: the plumb cut at the ridge, the bird's mouth where it seats on the wall plate, and the tail cut at the eave. Make a template rafter from scrap, test it for fit, then use it to mark and cut every subsequent rafter identically.
Install rafters on 16 inch centres, matching your wall stud layout so loads transfer directly down through the structure. A structural ridge board runs along the peak, receiving each pair of opposing rafters. Add collar ties, horizontal boards connecting opposing rafters, to prevent the roof from spreading and pushing your walls outward.
Step 5: Sheathe and Roof
Cover the roof frame with 7/16 inch OSB or 1/2 inch plywood sheathing, again staggering joints and ensuring edges fall on rafters. Install drip edge along all edges before laying roofing felt (15 lb felt is standard), then your chosen roofing material. Architectural shingles are the most DIY friendly roofing material, they come in standardised sizes, install with a pneumatic nailer or hammer, and last 20,30 years with minimal maintenance.
Step 6: Clad the Exterior
Exterior cladding options for DIY sheds include T1 11 siding (plywood with built in vertical grooves, fastest and easiest), board and batten (individual boards with strips covering the gaps, traditional look), and horizontal lap siding (classic house appearance). T1 11 is the best choice for a first shed: it installs in large panels, provides structural sheathing and weather barrier in one step, and requires minimal cutting skill.
Work from the bottom up, maintaining a minimum 2 inch clearance from the ground on all siding. Seal all cut edges immediately with exterior primer, unsealed plywood edges wick water and delaminate rapidly. Paint or stain within 60 days of installation for maximum weather protection.
Step 7: Install Doors and Windows
Double doors (two panels meeting in the centre) are more practical than a single door for most shed sizes, they allow wheelbarrows, mowers, and sheet materials to enter easily. Build doors from the same exterior siding material as your walls, stiffened with a diagonal Z brace on the inside to prevent racking. Pre hang in the opening with 1/8 inch gaps on all sides, then install with three heavy duty strap hinges per door.
Windows provide ventilation and light. A simple fixed window, just a piece of polycarbonate glazing screwed to a timber frame, is perfectly adequate for tool storage. Operable windows improve ventilation significantly for workshop use sheds. Ensure all window openings are flashed with metal or self adhesive flashing tape before installing the window frame, unflashed windows are the leading source of rot in DIY sheds.
Final Finishing and Maintenance
A well built timber shed, properly finished and maintained, will easily last 30,40 years. The maintenance schedule is simple: inspect and re treat all exterior timber annually (or when water stops beading on the surface), check roof flashings and ridge cap every two years, and paint or stain as needed, typically every 5,7 years for good quality exterior coatings.
🏡 Get Your Complete Shed Plans Now
Skip the guesswork with professionally designed shed plans that include full cut lists, foundation options, framing diagrams, and material quantities. Every size from compact 6×4 tool stores to large 16×20 workshop sheds.
Get Professional Shed Plans →